

How To Draw Feathers In Krita
Painting fur
Question
What brushes are best for fur textures?
So typically, y'all run across the same logic applied on fur as on regular Castor-tips:Pilus.
Even so, yous can make a castor a lilliputian easier by using the Slope, Mix and HSV options in the pixel and color smudge brushes. Basically, what nosotros want to do is have a stroke start dark and then become lighter as nosotros draw with it, to simulate how pilus-tips catch more light and wait lighter due to being thinner at the ends, while at the base they are frequently more dark.
Annotation
This tutorial contains outdated screenshots, but you should be able to follow along if you ignore a bit unlike look of the brush editor. Originally it also used brush preset and brush tip from the older resources set up (ink_brush_25 and A - ii Dingy Brush), merely you should be able to get similar results with castor preset b) Basic-five Size and brush tip sparkle or other like castor preset (based on Pixel Engine) and similar brush tip (multiple dots).
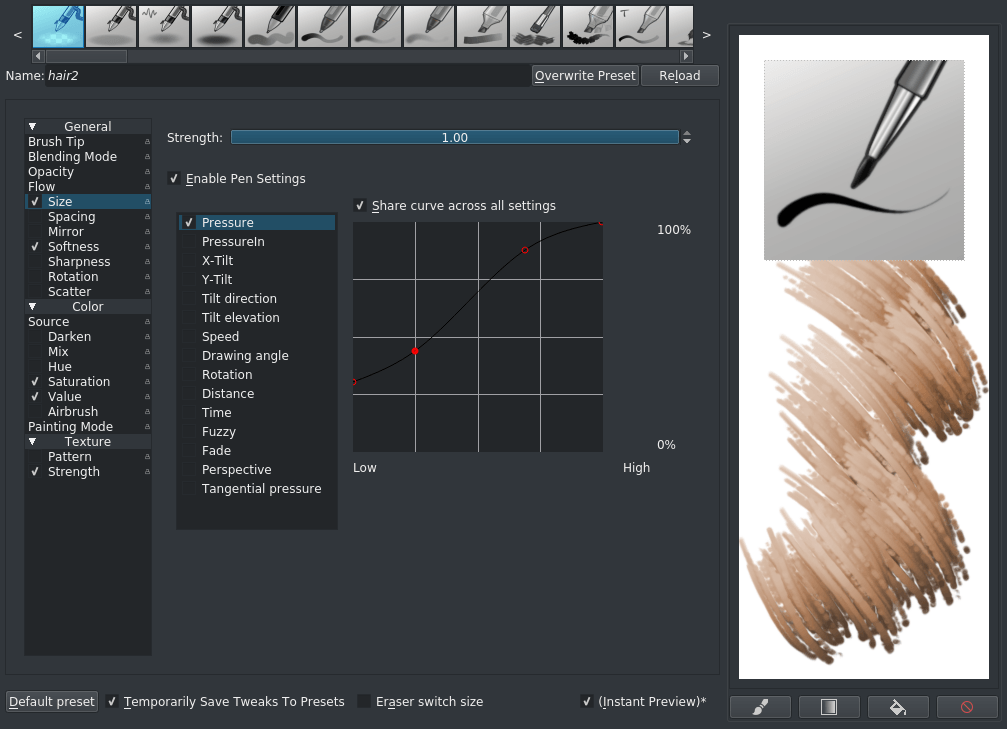
Take the b) Bones-v Size and choose under . Set the spacing to Auto and right-click the spacing bar to type in a value betwixt 0.25 and 0.4. Also plow on the Enable Pen Settings on flow. Replicate the pressure curve above on the size selection. We don't desire the hairs to collapse to a point, hence why the curve starts so high.
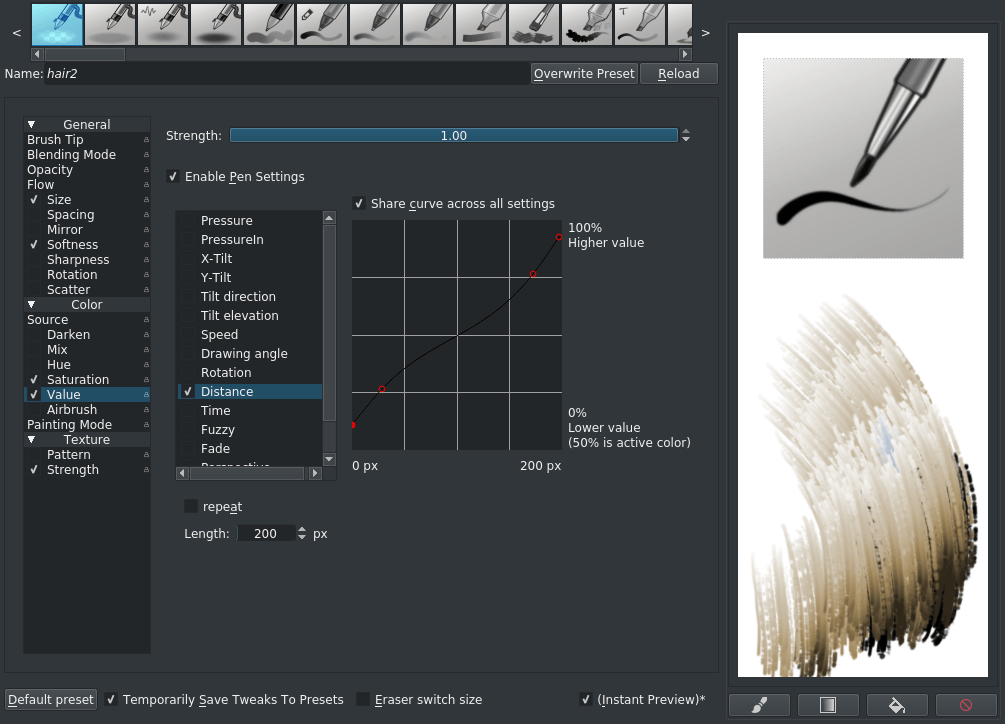
And so actuate value and reproduce this bend with the Distance or Fade sensor. Like how the force per unit area sensor changes a value (like size) with the amount of force per unit area you put on the stylus, the altitude sensor measures how many pixels your stroke is, and can change an option depending on that. For the HSV sensors: If the curve goes beneath the centre, it'll become remove from that adjustment, and in a higher place the vertical middle it'll add to that adjustment. And then in this case, for the get-go 100px the brush dab will get from a darkened version of the agile paint color, to the active paint color, and and so for 100px+ information technology'll go from the agile color to a lightened version. The curve is an inverse Southward-curve, because we want to requite a lot of room to the mid-tones.
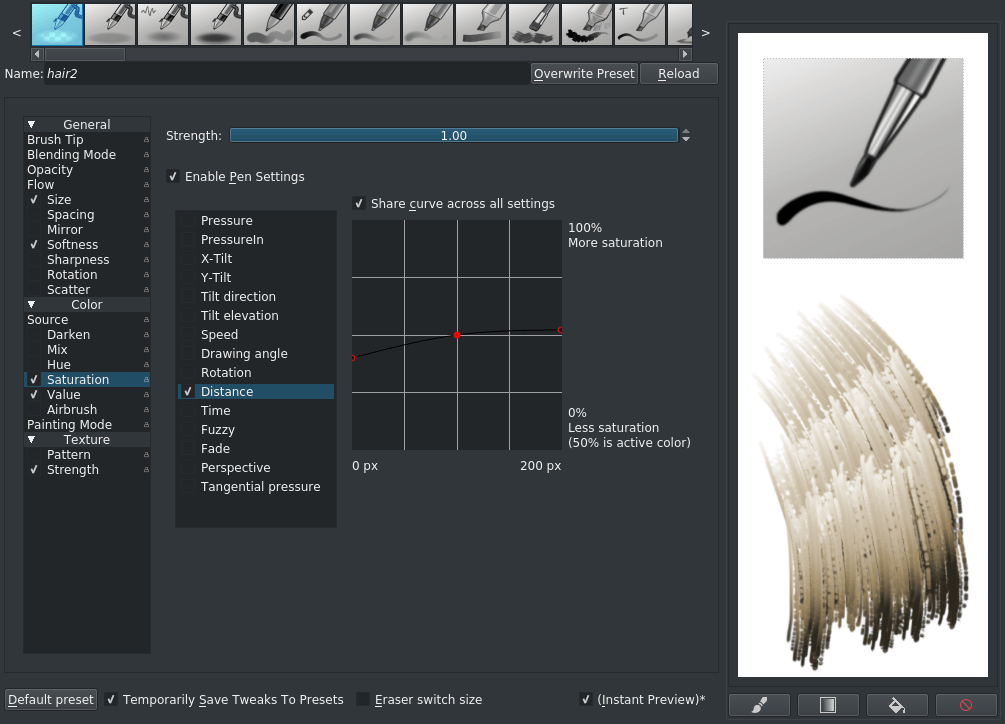
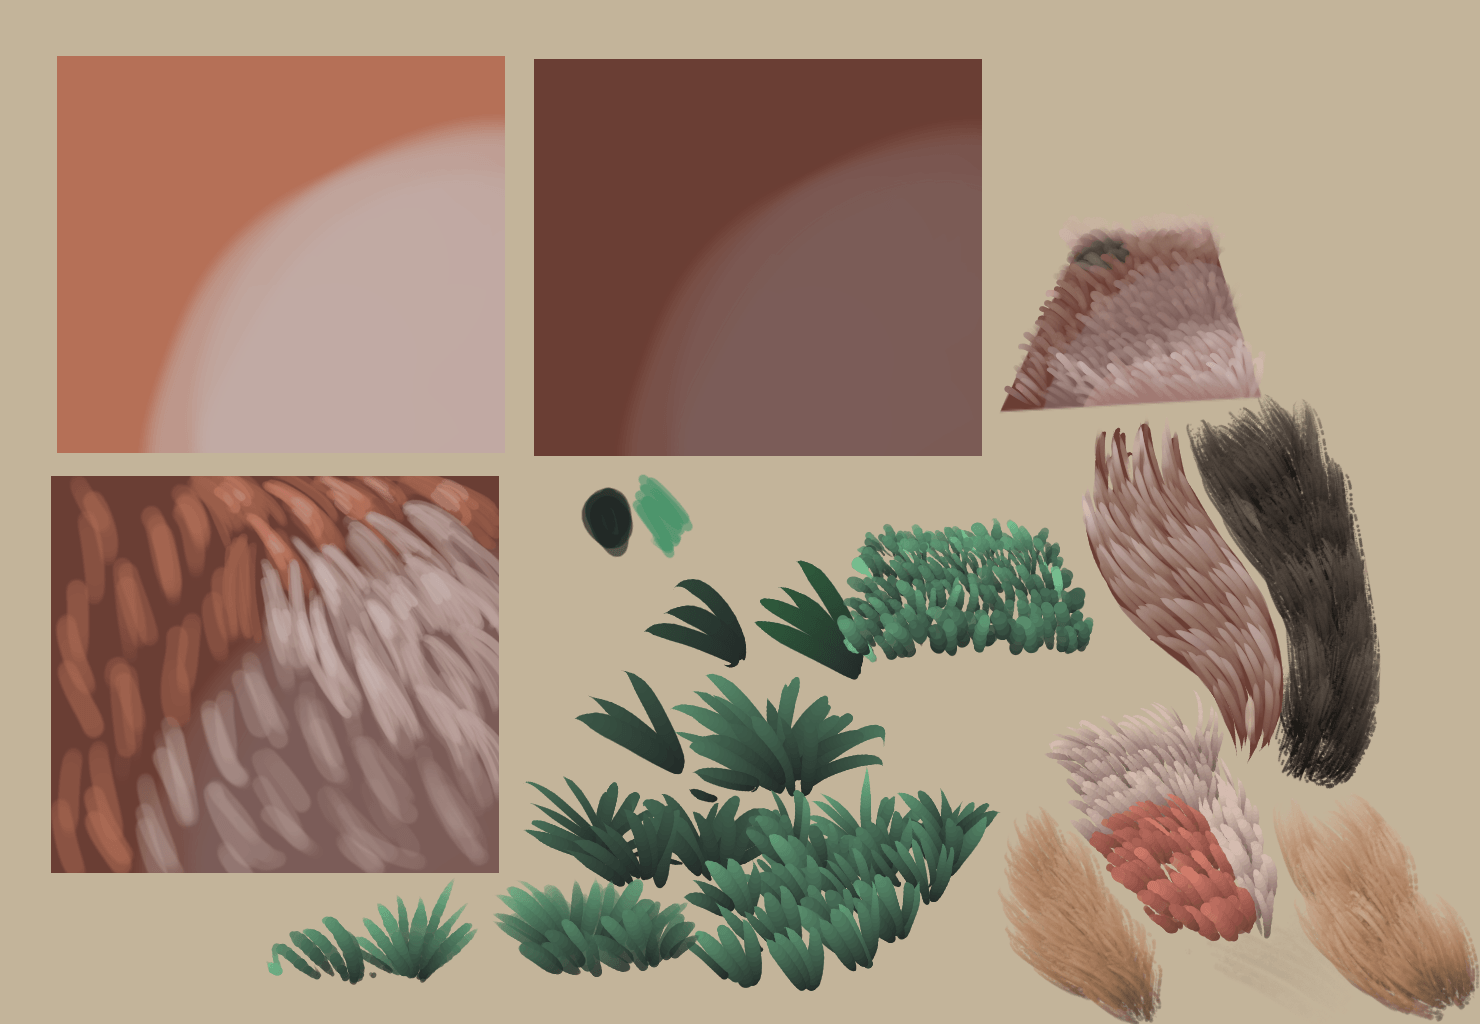
We do the aforementioned thing for saturation, so that the darkened color is also slightly desaturated. Notice how the curve is close to the eye: This means its result is much less strong than the value adjustment. The upshot should look somewhat like the fifth one from the left on the offset row of this:
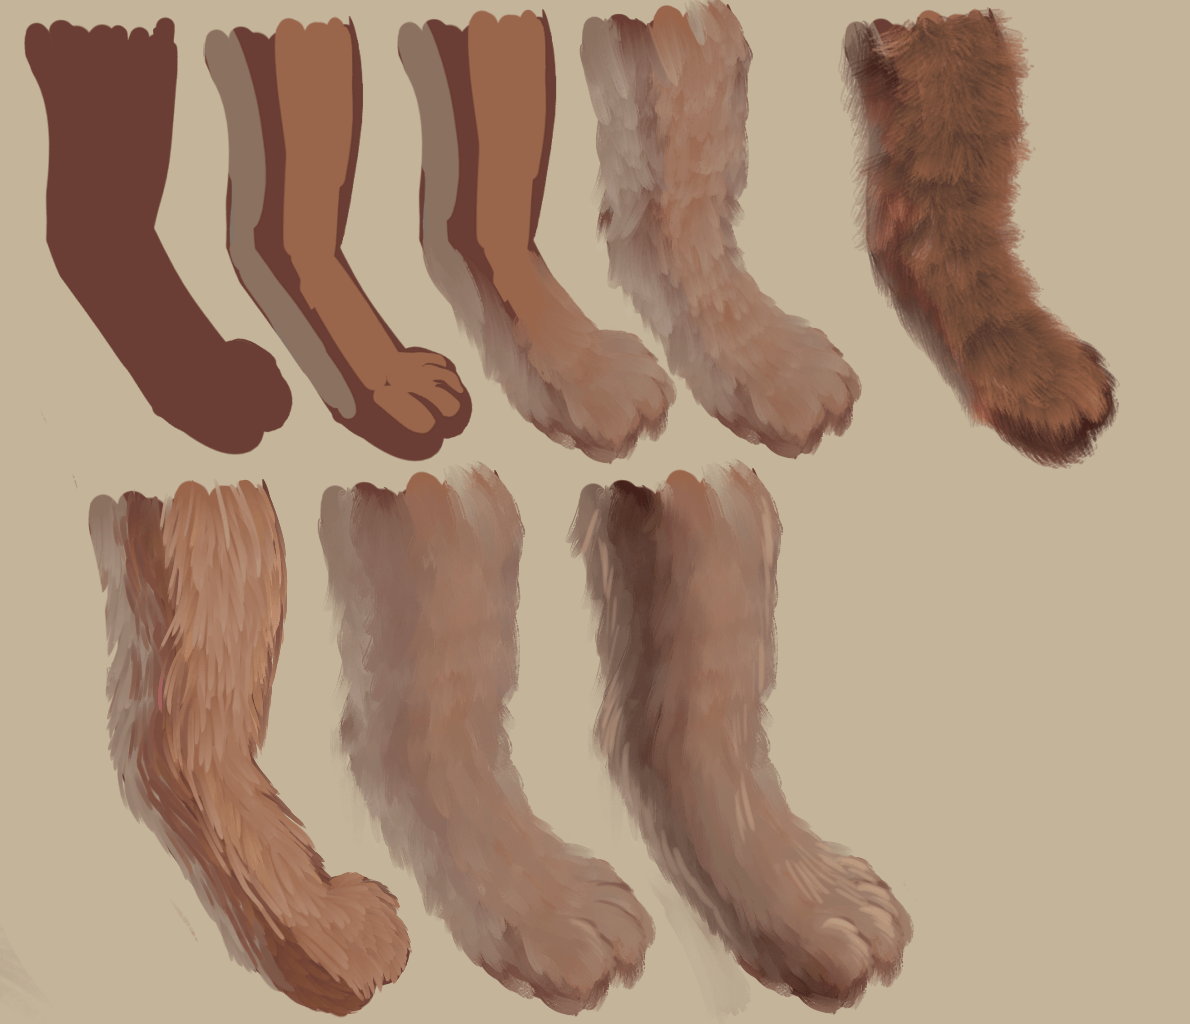
The others are done with the smudge brush engine, merely a similar setup, though using colour rate on distance instead. Do note that it's very difficult to shade realistic fur, and so keep a good eye on your form shadow. You can also use this with grass, feathers and other vegetation:
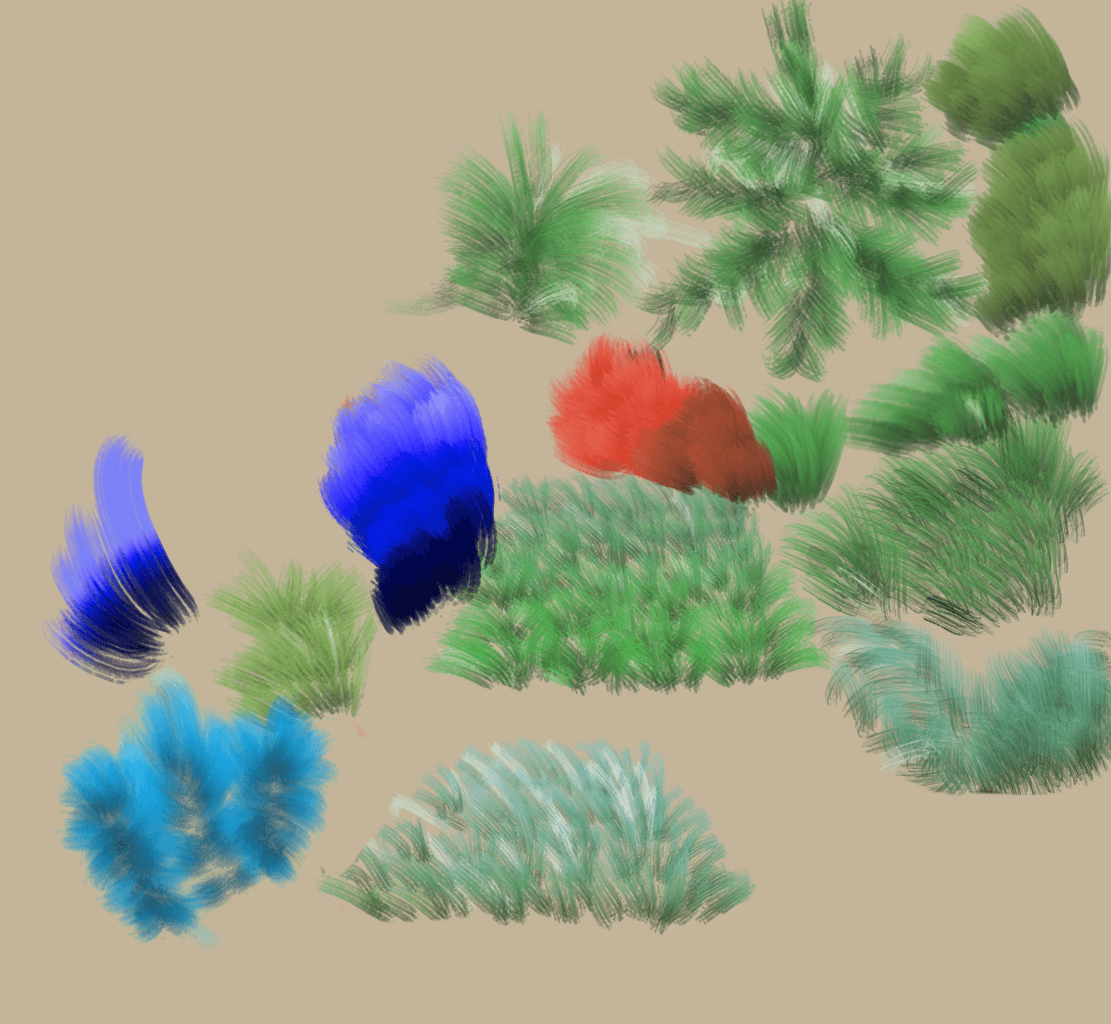
For example, if you lot apply the mix choice in the pixel brush, it'll mix between the fore and background colour. You lot can even attach a gradient to the color smudge brush and the pixel castor. For color smudge, this is only the Gradient pick, and it'll use the active gradient. For the pixel brush, set the color-source to Gradient and utilize the mix option.
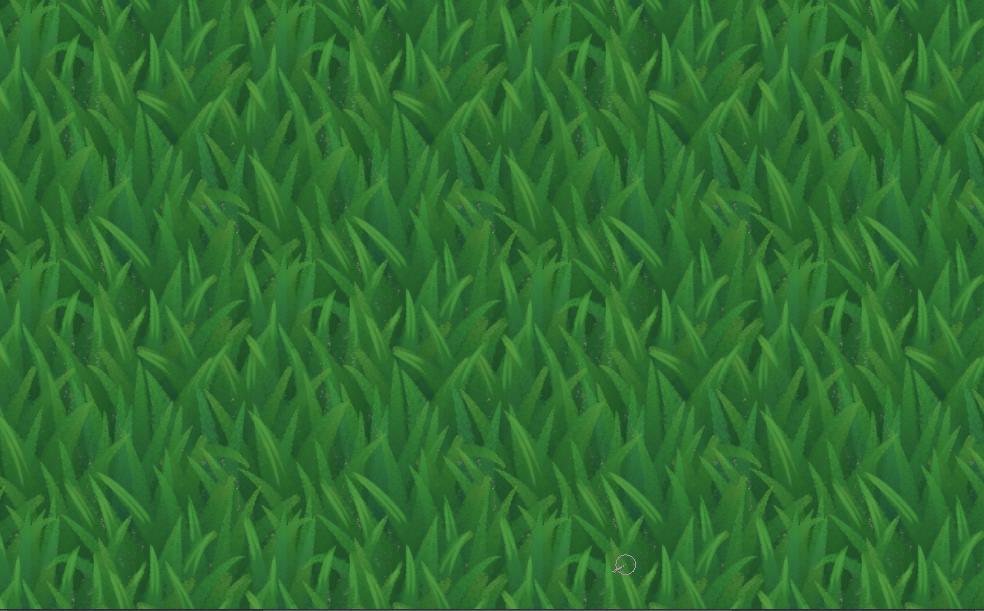
You tin as well combine this with the lighter color blending way and wraparound style to make making grass-textures actually easy!

Source: https://docs.krita.org/en/tutorials/krita-brush-tips/fur.html
Posted by: longgonly1982.blogspot.com
0 Response to "How To Draw Feathers In Krita"
Post a Comment